| Nome | tie collar pullover top |
| Stato | finito |
| Contentezza | |
| Iniziato | 25/apr/2017 |
| Completato | 26/apr/2017 |
| Progresso | 100 % |
| Riservatezza | pubblico |
| Note | Made in straw coloured satin. I've had real difficulty in understanding how the collar goes on the shirt. so far my interpretation of the instructions. which seems to be correct. 1. Fold the collar in half lengthwise, right sides together. Sew between the "o" marks and again between the arrow markers so that the long straight stretch is not sewn. Clip the seam allowance at markers, turn the collar inside out and iron. 2. Stitch the darts and press up. 3. Sew the shoulder seams, iron towards the back and serge the seams. 4. On the right side of the front clip the seam allowance at the point of the front and the marker. serge the edge and fold over and topstitch. 5. Sew the short edge of the collar (the end closest to the "o" marks) to the left of the front between the mark and the bottom point of the neckline, making pleats in the collar. Stitch the outside of the collar into the neckline of the garment from the marker on the right side to the bottom point of the neckline. Iron the seam allowances towards the collar. Fold in and iron the other seam allowance towards the collar and stitch it carefully to the seam. Thread the tie through the resulting hole. The rest is obvious except I do not know what a fixing is. I need to insert a fixing near the armhole. any ideas? I asked Lekala, the fixing is a bar tack. |
Benvenuto, Visitatore | Avete 0
tie collar pullover top


| Camicetta - Cartamodello #4075 |
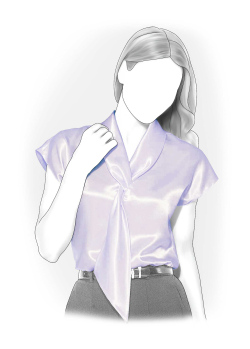 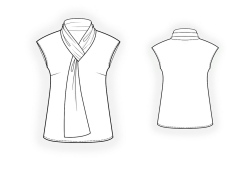  |
| Semi-aderente Tagli Scollo a V Bow collar Senza maniche |
Commenti degli utenti