| Name | Satin blouse |
| Status | in progress |
| Happiness | |
| Started | Dec 29, 2023 |
| Completed | |
| Progress | 90 % |
| Privacy | public |
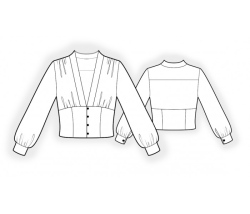
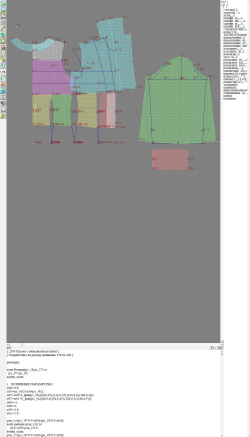
| Notes | 29/12 I've cut out the pattern 30/12: The collar is included in the front piece. The collar seems awfully broad and the shoulder gathering is quite small in comparison... I also think the instructions are a bit confusing starting from step 6. I've done everything what the instructions tell me to do. "topstitch collars into seam connecting to neckline" leaves me a weird collar: the back collar is 1,5x the width of the collar at the front. folding the facing over evenly would make the collar at the neck 2 times as wide as the bottom. The technical drawing shows a clear line around the collar, but it can't be folded over, nor can I topstitch the whole collar without having a line that crosses over the fold in a weird way. I must have made a mistake. Let's see how it looks when everything else is finished. Step 11 tells me to "pin cuffs together". If I had 2 only, I would have to fold it, but then there wouldn't be marking for 2 buttonholes. I cut 2 pairs. 31/12: Put in the sleeve and finished the hem by sewing on bias binding and turning it inside. It's gaping a bit/bunching up around the waist so I put in a piece on boning on the loop side. I added 3 more loops and still want to add some (light!) boning in the side seams. However, it's finished just in time to wear it for NYE. I'll continue trouble shooting and actually finishing all the inside seams with either bias binding or making fake french seams later. I think I should've turned over the facing of the upper body once more and that's where part of the trouble with the collar lies. I like it regardless so I'll see if I'll actually change that or leave it the way it is. 1/1/24: In the second picture I added the pieces that gave me some grieve and marked in red what I would change to achieve a better result: a more fitted collar compared to what I got, more gathering on the shoulder seam and facing pieces that can actually attach to each other without being confusing. I still haven’t figured out what the two notches on the upper front were meant to do. But that's okay. I'm going to order some different buttons (I used acrylic black pearls I had on hand, but the holes are quite big and I think a 1-2 mm smaller button would work better with the loops). For now it's definitely wearable and good enough. Next time I would maybe interface the bodice pieces so they are less wrinkly while wearing it. I do also think the boning was a good addition, I may add it to both sides of the button stand. Everything I've done differently: * I cut out four of the cuff instead of two, and interfaced two. I made it about 3 cm smaller and added 3 loops instead of the 2 buttonholes (this was too small, but I used elastic thread to put the buttons on so I can get the cuff on easily). * I taped the yolk and upper back together so it would form one piece, eliminating the seam there. * I'm using a double face 5 mm satin ribbon instead of making my own bias binding for the button loops. This is quicker and easier. * I'm sewing everything by hand because I'm too lazy to change the thread in my sewing machine and serger. But, I did melt the edges because I was using a cheap polyester satin and added some bias binding to other edges to keep from fraying. * Adding 7 loops/buttons instead of the 4, and adding light boning to the right centre front (and side seams). |
Welcome, Guest | You have 0
Satin blouse


Users Comments